I guess I've been doing a lot of nail art lately, so I am just going to show you three designs I've done lately with some thoughts about the polishes and tools I used for them.
1. Star Trek Galaxy Nails
For the pink base on the pinkie, middle and index, I used Zoya "Dot." For the galaxy nails, I stamped some blue and purple neon polish on the nails, added stars with a white striper and added glitter with Sally Hansen "Disco Ball." For my starfleet uniform nail, I painted the nail blue Julep "Iona"and added a wavy black line to the tip. For the Commbadge, I cut up a nail sticker in the desired shape and put it on the nail.
I freehanded the Enterprise with a black nail art pen and covered it with the same glitter as the galaxy nails.
2. Starfleet Uniform Nails
A simpler version of the ring finger on the previous design with red, yellow and blue polishes. I suppose you could add some rhinestones to show ranks on some of your nails.
3. Neon Leopard Print
These I did with my Kleancolor neon polishes, white striper and black nail art pen. The key to this look is a high density of spots.
Monday, August 11, 2014
Tuesday, August 5, 2014
Julep- Paulette
This polish is one of Julep's limited edition monthly polishes from the May "Fresh Twist" collection. It's one designed for the "Boho Glam" girl, but I still really like it a lot. It's a beautiful color: a light purple with a gold shimmer.
The formula is really thick, and I guess I really could have gone with only one coat. However, like most Julep polishes, the first coat dried a little matte, so I felt the need to add another one. One thing I like about the polish, as with most "indie" polishes is that it's high quality enough to not smell like the toxic sludge that goes into some mass market polish.
To create my "fishnet" or "quilted" design, I just positioned some pieces of striping tape over the dry polish at 90 degree angles from each other and painted black over it, allowing no dry time and peeling the tape off right away so that the polish wouldn't chip while reveling the design.
The formula is really thick, and I guess I really could have gone with only one coat. However, like most Julep polishes, the first coat dried a little matte, so I felt the need to add another one. One thing I like about the polish, as with most "indie" polishes is that it's high quality enough to not smell like the toxic sludge that goes into some mass market polish.
To create my "fishnet" or "quilted" design, I just positioned some pieces of striping tape over the dry polish at 90 degree angles from each other and painted black over it, allowing no dry time and peeling the tape off right away so that the polish wouldn't chip while reveling the design.
Thursday, July 31, 2014
Teepee nails
Hello all! Sorry for that two week hiatus- I was doing paleontological fieldwork up in northern Montana with very slow internet access and no nail polish. Anyways, I thought I would do a little tribute to the teepee that was my home for the better part of two weeks up there while we excavated dinosaur nests.
I chose to do kind of a sunrise look using oranges and blue. The colors I used were Wet n' Wild "Sunny Side Up," Sally Hansen Xtreme wear in "Crushed" and Mineral Fusion in "Grotto." I put them on a beauty blending sponge and applied over a white base to achieve the effect.
For the teepee, I drew a triangle shape with a white striper and outlined with a black nail art pen. I drew the door with black polish.
The finished look:
And the inspiration:
I chose to do kind of a sunrise look using oranges and blue. The colors I used were Wet n' Wild "Sunny Side Up," Sally Hansen Xtreme wear in "Crushed" and Mineral Fusion in "Grotto." I put them on a beauty blending sponge and applied over a white base to achieve the effect.
For the teepee, I drew a triangle shape with a white striper and outlined with a black nail art pen. I drew the door with black polish.
The finished look:
And the inspiration:
Wednesday, July 16, 2014
Kleancolor- Neon Orange
This is number 5 of six of reviews and looks using the Kleancolor neon collection. They are available on Amazon and elsewhere online for about $3-5 USD each.
I love this color! It's pretty flattering on my skin tone, but it could be a stretch for others considering just how bright it is. The formula is great: goes completely opaque in one coat, and no cleanup was necessary in the picture because it is such a thick polish and will not go where it isn't wanted. My one complaint is that it dries a little matte, but this can easily be fixed with topcoat.
In the design below, I painted all of my nails with Neon Orange, then made some daisies with my Sally Hansen white striper, and made the dots in the center with Julep in "Kelsey." I kept them kind of neutral to try and counteract the brightness of the orange polish.
I love this color! It's pretty flattering on my skin tone, but it could be a stretch for others considering just how bright it is. The formula is great: goes completely opaque in one coat, and no cleanup was necessary in the picture because it is such a thick polish and will not go where it isn't wanted. My one complaint is that it dries a little matte, but this can easily be fixed with topcoat.
In the design below, I painted all of my nails with Neon Orange, then made some daisies with my Sally Hansen white striper, and made the dots in the center with Julep in "Kelsey." I kept them kind of neutral to try and counteract the brightness of the orange polish.
Labels:
Ciate,
Julep,
Kleancolor,
Nail Art,
Neon,
Sally Hansen
Monday, July 14, 2014
Abstract Dreamcatcher Nails
Here is my companion piece to the dotted bow nails, a slightly less girly mix and match manicure in pink and aqua. I used a detail paintbrush, a cosmetic sponge and some rhinestones as far as tools needed for these nails.
Materials and methods, from right to left:
Thumb: Two coats of OPI's "Got a Date To-Knight," seal with matte topcoat, gold glitter gradient with Orly FX "Too Fab" on top 2/3 of nail.
Pinky and pointer: 2 coats of Sally Hansen "White On." Load up cosmetic sponge with Layla "Aqua Zen" and "Got a Date To-Knight." Blend onto nail with sponge so that the aqua is on the tip of the nail. Seal with regular fast drying top coat.
Middle Finger: 2 coats of Essie's "Mint Candy Apple." Painted design with small nail detail brush and OPI's "Black Onyx." Three rhinestones were randomly placed on design and sealed in with more top coat.
Ring: 2 coats of Ulta's "High Roller," 2 coats of "Too Fab."
All the colors worked quite nicely together, except Aqua Zen. I was originally going to use it for the center nail, but it was too dark to contrast with the black to make the design pop. It works well as an ombre color on the sponge painted nails because blending it with a light pink and a white is much less dramatic.
More pictures of the nail art:
(I made the bracelet too. The band is copper I sawed cutouts from and the stone in the middle is a piece of buffalo jasper).
Materials used: Ciate fast drying top coat, Sally Hansen "White On" Orly matte top coat, Julep base coat, tweezers for rhinestone placement, wedge sponge for ombre nails, Essie "Mint Candy Apple"
OPI "Black Onyx" little plastic card sleeve for painting/mixing, Ulta "High Roller" OPI "Got a Date To-Knight" Orly "Too Fab" Layla "Aqua Zen."
Materials and methods, from right to left:
Thumb: Two coats of OPI's "Got a Date To-Knight," seal with matte topcoat, gold glitter gradient with Orly FX "Too Fab" on top 2/3 of nail.
Pinky and pointer: 2 coats of Sally Hansen "White On." Load up cosmetic sponge with Layla "Aqua Zen" and "Got a Date To-Knight." Blend onto nail with sponge so that the aqua is on the tip of the nail. Seal with regular fast drying top coat.
Middle Finger: 2 coats of Essie's "Mint Candy Apple." Painted design with small nail detail brush and OPI's "Black Onyx." Three rhinestones were randomly placed on design and sealed in with more top coat.
Ring: 2 coats of Ulta's "High Roller," 2 coats of "Too Fab."
All the colors worked quite nicely together, except Aqua Zen. I was originally going to use it for the center nail, but it was too dark to contrast with the black to make the design pop. It works well as an ombre color on the sponge painted nails because blending it with a light pink and a white is much less dramatic.
More pictures of the nail art:
(I made the bracelet too. The band is copper I sawed cutouts from and the stone in the middle is a piece of buffalo jasper).
Materials used: Ciate fast drying top coat, Sally Hansen "White On" Orly matte top coat, Julep base coat, tweezers for rhinestone placement, wedge sponge for ombre nails, Essie "Mint Candy Apple"
OPI "Black Onyx" little plastic card sleeve for painting/mixing, Ulta "High Roller" OPI "Got a Date To-Knight" Orly "Too Fab" Layla "Aqua Zen."
Labels:
Essie,
Glitter,
Nail Art,
OPI,
Orly,
Pastels,
Red Carpet Manicure,
Sally Hansen,
Ulta
Saturday, July 12, 2014
Dotted Bow Nails
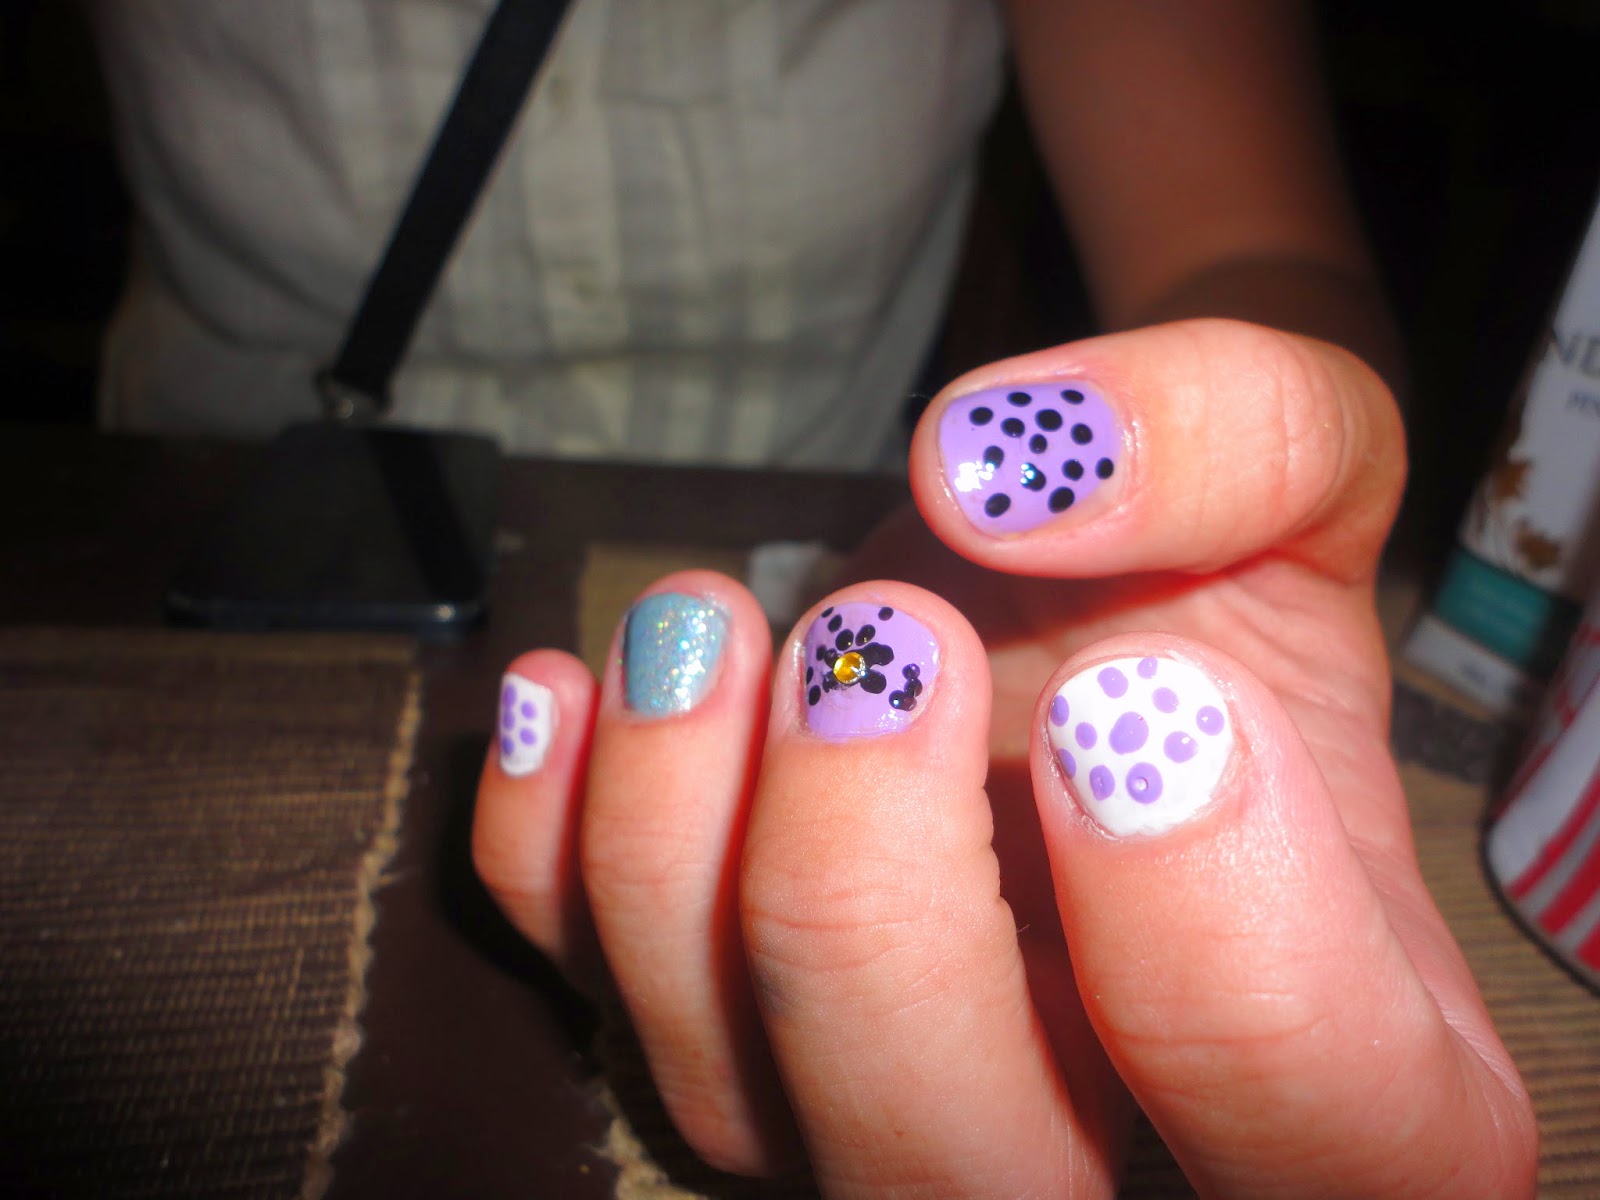
It's been a long, long while since I have picked up a dotting tool, and I thought tonight would be a great time to play around with polka dots and some new colors I picked up lately. Since dotting (for me) is a pain in the butt on my opposite hand, I used my friend Emma's fingers to try out this look. The design is loosely based on Youtuber Elleandish's bow nails, and the color scheme is just based on a few of my new polishes I thought would look good together.
For this look, I used:
-Julep in "Bergen"
-Sally Hansen Xtreme Wear in "White On" and "Disco Ball"
-Tweezers for placing gems
-Revlon in "Enchanted"
-OPI in "Black Onyx"
-A pink card protector (Dragon Shield brand) for a palette for dotting the colors
-Red Carpet Manicure brand dotting tool
-Some gold rhinestones
-Ciate fast drying topcoat
On the pinky and pointer: Two coats of White On, dots with small end of dotting tool in Enchanted.
On the ring finger: Two coats of Bergen and two coats of Disco Ball
On the thumb: two coats of Enchanted, small end of dotting tool dipped in Black Onyx
On the middle finger: two coats of enchanted, Large black dot in center of nail, small black dots in a bow shape around the central dot, gold rhinestone on top of the original large black dot.
Top coat on all of the nails once it dried.
More pictures of the finished manicure:
For this look, I used:
-Julep in "Bergen"
-Sally Hansen Xtreme Wear in "White On" and "Disco Ball"
-Tweezers for placing gems
-Revlon in "Enchanted"
-OPI in "Black Onyx"
-A pink card protector (Dragon Shield brand) for a palette for dotting the colors
-Red Carpet Manicure brand dotting tool
-Some gold rhinestones
-Ciate fast drying topcoat
On the pinky and pointer: Two coats of White On, dots with small end of dotting tool in Enchanted.
On the ring finger: Two coats of Bergen and two coats of Disco Ball
On the thumb: two coats of Enchanted, small end of dotting tool dipped in Black Onyx
On the middle finger: two coats of enchanted, Large black dot in center of nail, small black dots in a bow shape around the central dot, gold rhinestone on top of the original large black dot.
Top coat on all of the nails once it dried.
More pictures of the finished manicure:
I really like the new polishes I used. Disco ball was a little disappointing because I thought it would be more full coverage based on how it looked in the bottle, but layered over the silver polish it actually looked really cool. This is a really good look for any nail length as you can add as many or as few dots to the nails as you think looks good.
Labels:
Ciate,
Glitter,
Julep,
Nail Art,
OPI,
Red Carpet Manicure,
Revlon,
Sally Hansen
Monday, July 7, 2014
Essie- Tart Deco
It's high time I do a post featuring one of my oldest, trustworthiest, most favorite colors in my collection. Tart Deco is a classic Essie shade, and I think I first picked up this color about 3 years ago on a whim at Target. It's a really bright pinky orange or peach creme polish, which looks really good with well... just about every color I've ever tried it with, but it looks especially cool with gold glitter on top. My one itty bitty complaint is that the formula is a little too thin, and that it's best to apply about three coats for opacity with this one.
I decided to get a little whimsical last night and added some teal with black stripes, a little navy blue and a matte topcoat. The teal is Orly in "Gumdrop," the navy is Kleancolor in Neon Sapphire and the black stripes are from my Sally Hansen black nail art pen. The matte topcoat is also Orly.
Subscribe to:
Posts (Atom)